Beginner
InvolveXR OnScreen: first-time user guide
Train on your computer with no headset needed. Set up the app, learn the controls, and complete your first lesson with confidence.
Release 18What's changed on this pageEverything new →
01Before you start
What you'll need
Check these before your first lesson.
System requirements
- A Windows PC
- Stable Wi-Fi, at least 5 Mbps download and 5 Mbps upload
- A web browser, to use the Web Portal
- Your InvolveXR account. Need one? See Creating your InvolveXR account.

Set up your audio and mic
You'll talk to virtual patients out loud, so sound matters.
- Use headphones for clearer audio during patient conversations.
- Make sure your computer's microphone is turned on and allowed.
02Download the desktop app
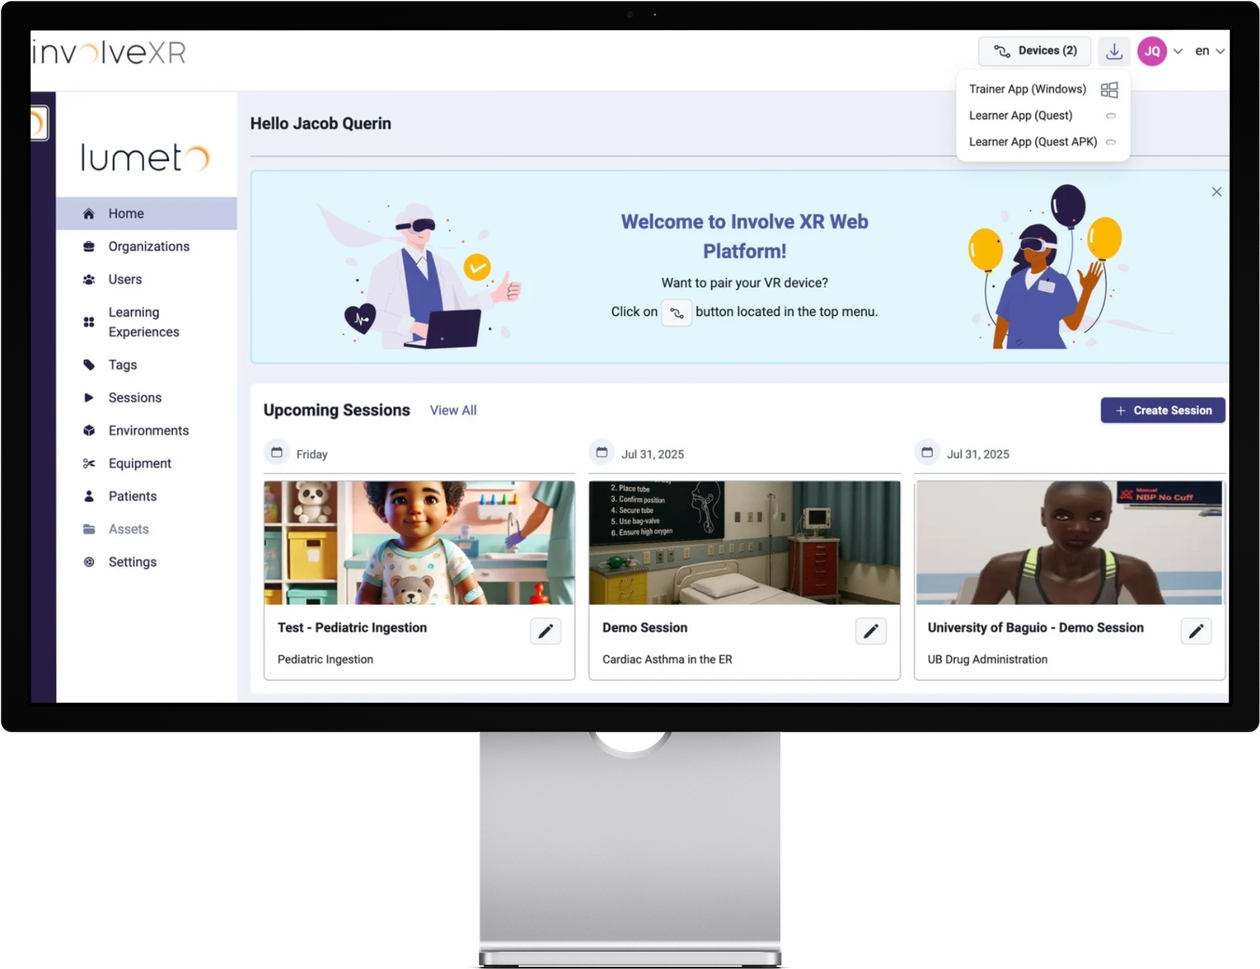
Install OnScreen from the Web Portal
- Go to healthcare.lumeto.com.
- Sign in with your learner account.
- At the top right, click the download icon, then select Trainer App (Windows).
- Open the downloaded file and follow the prompts to install.
03Pair the app with your account
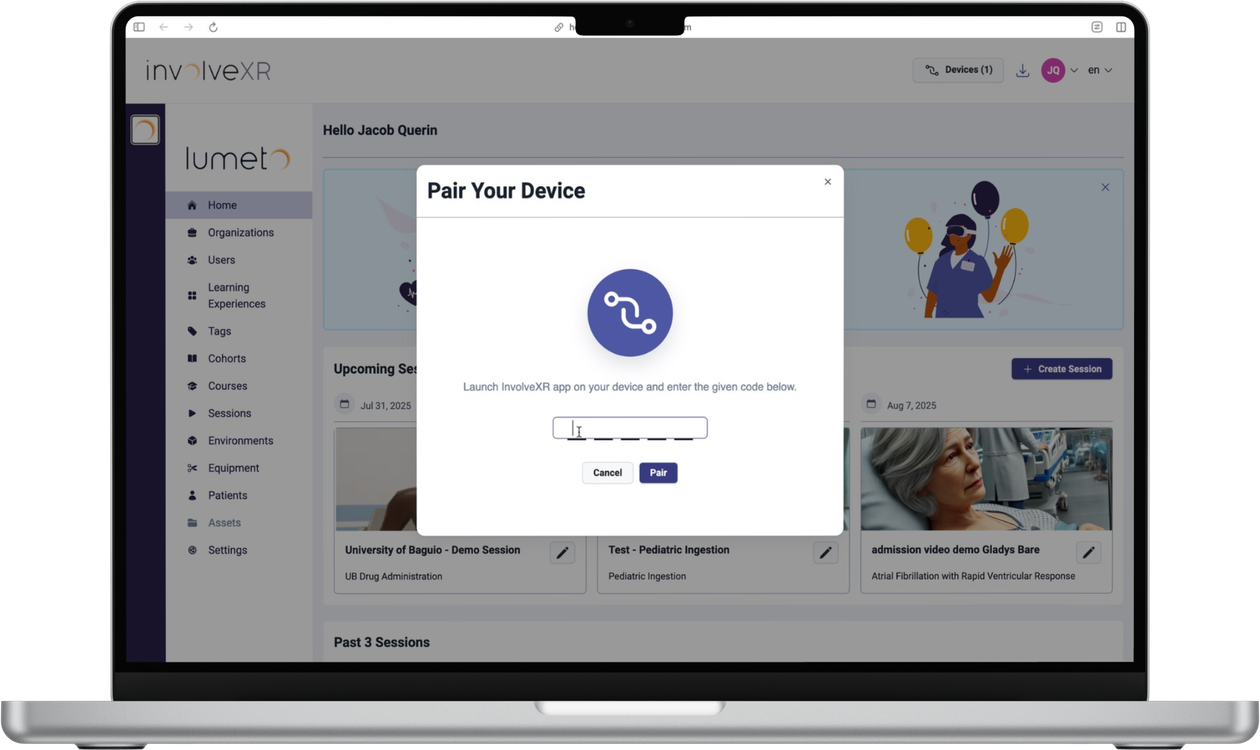
Pairing links the app to your learner account, so your lessons and results are saved to you. You only do this once per computer.
- Open the desktop app. It shows a pairing code.
- In your browser, go to healthcare.lumeto.com and sign in.
- Click Devices at the top right of the dashboard, then Pair Device.
- Enter the code in the New Device field and click Pair.
You're all set when
- The desktop app moves past the pairing code and shows your lessons
04Every scenario starts with a brief
Updated
When you launch a scenario, the Learner Brief opens as a set of cards. Read each one and click Continue. The last card is Start: click it to begin the scenario.
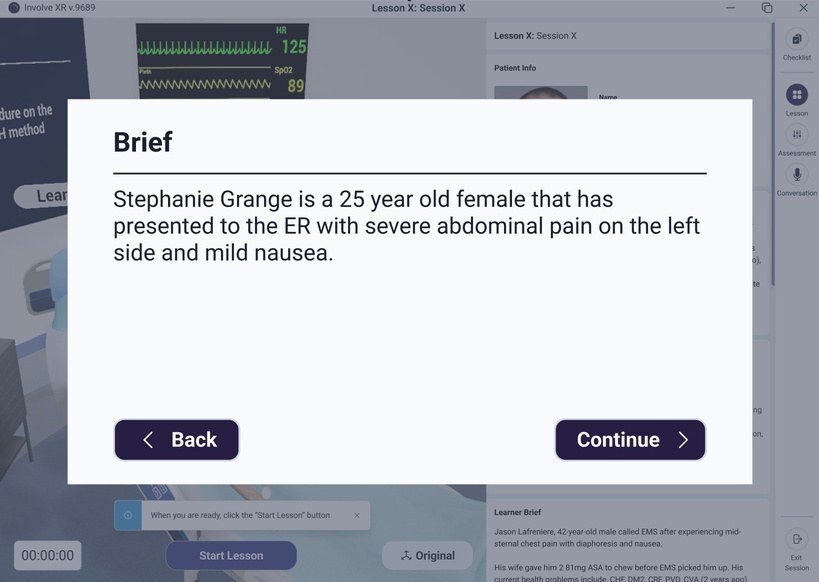
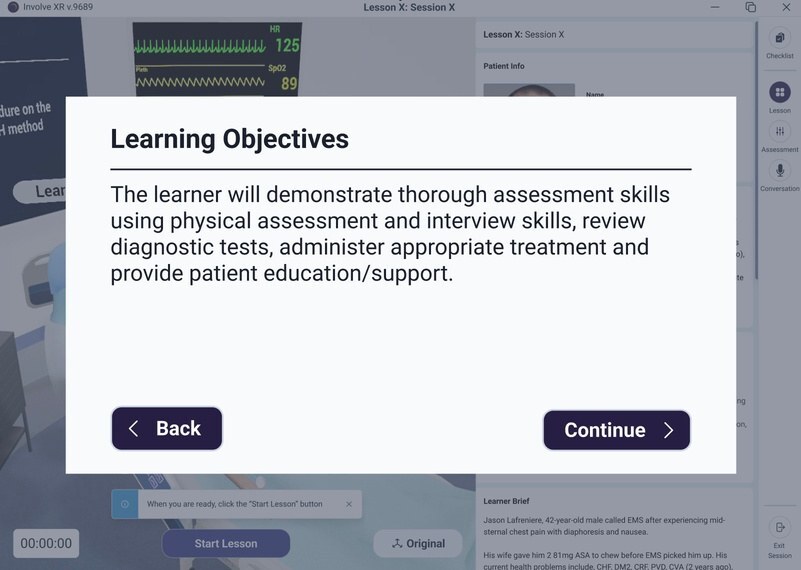

Clinical role and setting
Who you are in the scenario and where it takes place.
Patient background
The patient's history and why they've come in.
Expectations
What you're expected to do during the interaction.
Learning objectives
SometimesThe skills the scenario is designed to build.
05Your OnScreen controls
Updated
Five things to know
Everything happens with your mouse, keyboard, and the side menu on the right.
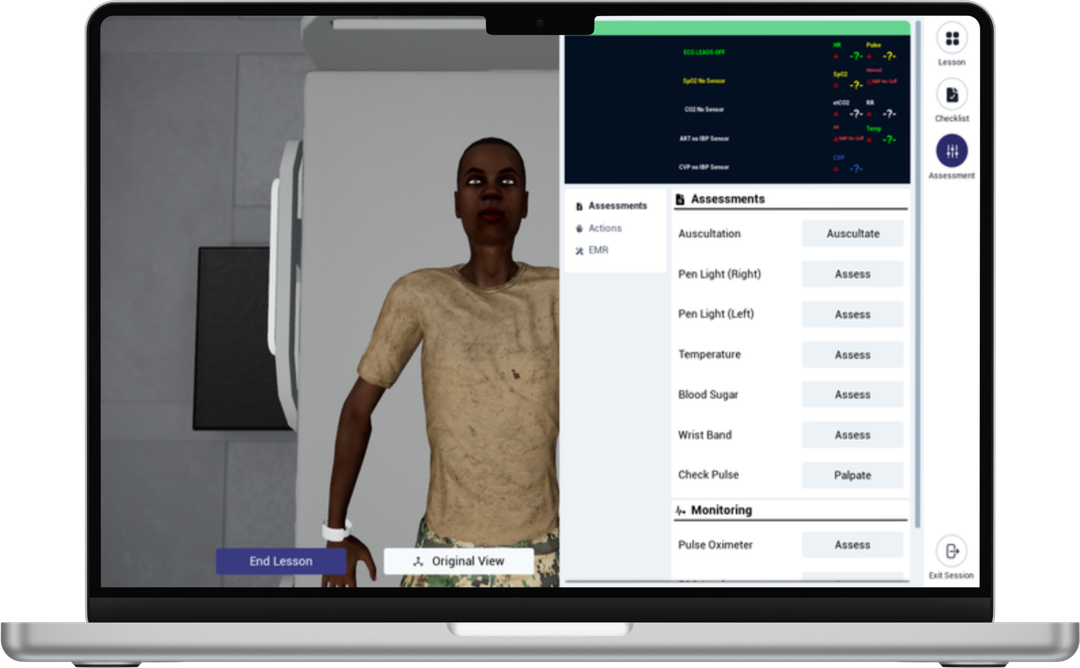
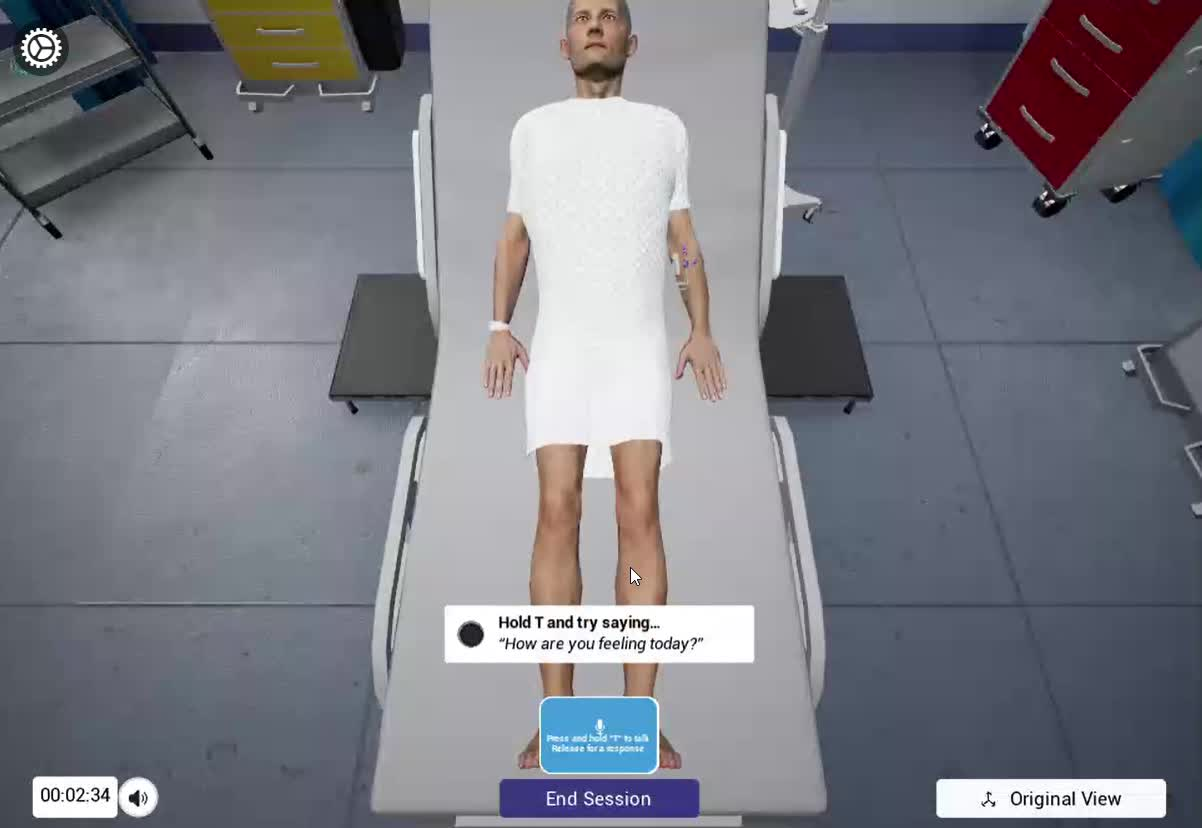
Talk to the patient
Hold TPress and hold T while you speak. Let go when you finish, and the patient responds. A pulsing circle on the speech widget shows you're being heard.
Move and interact
Side panelUse the side panel to move around and interact with the scene.
Actions and assessments
Side menuUse the side menu to assess the patient, take actions, and check the EMR tablet.
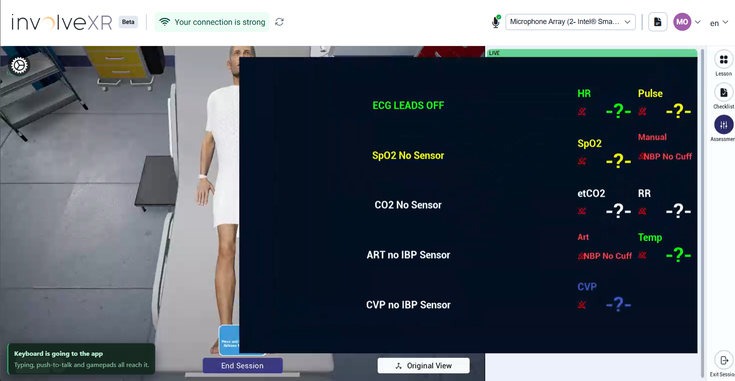
Magnify the monitor
HoverHover over the vitals monitor to zoom in on the numbers.
Reset the camera
Original ViewClick Original View to bring the camera back to its starting position.
💡
Tip
Keep holding T until you've finished your whole sentence. Letting go early cuts you off.
06Tools in the side menu
Updated
The side menu has three tabs, from top to bottom.
1
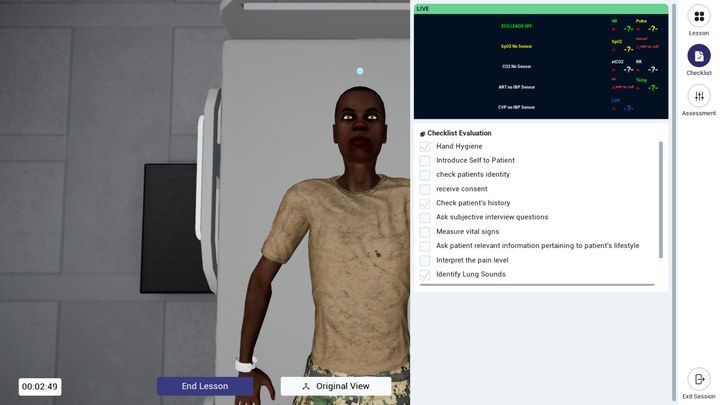
Checklist tab
Shows your objectives for the lesson and ticks off tasks as you complete them.
It only appears in education mode, and your educator may hide it depending on the lesson's goals.
2
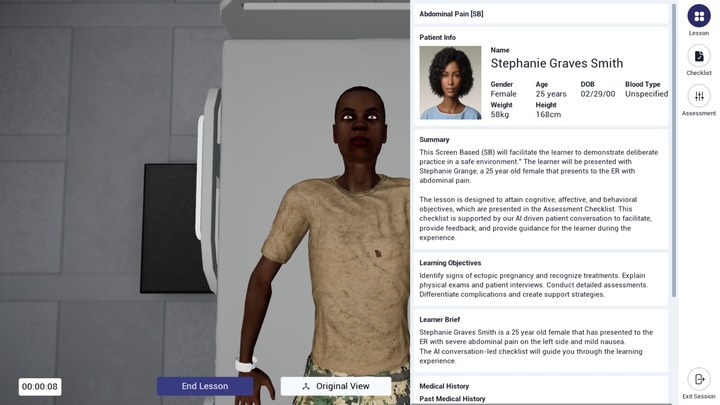
Lesson tab
An overview of the lesson, the patient, and the overall learning objectives.
3
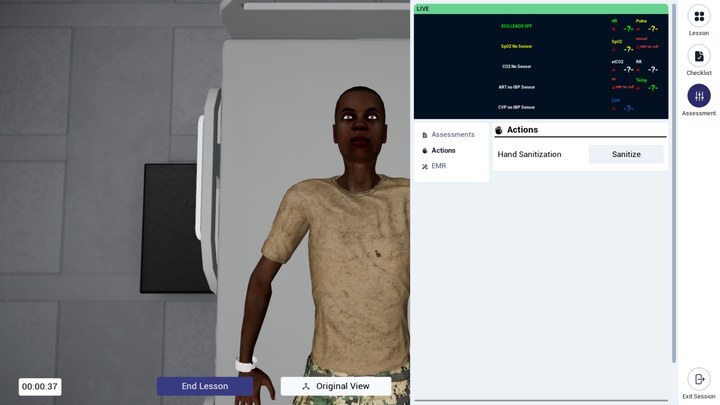
Assessment tab
Where you examine and treat the patient.
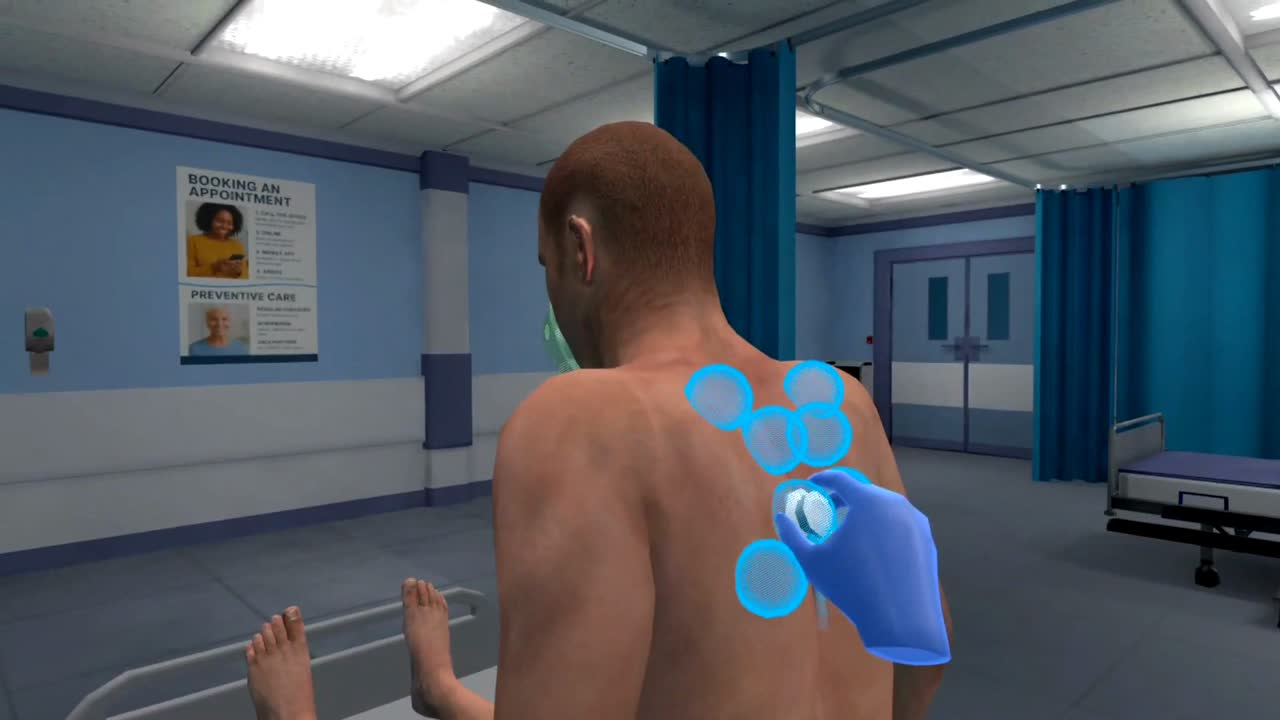
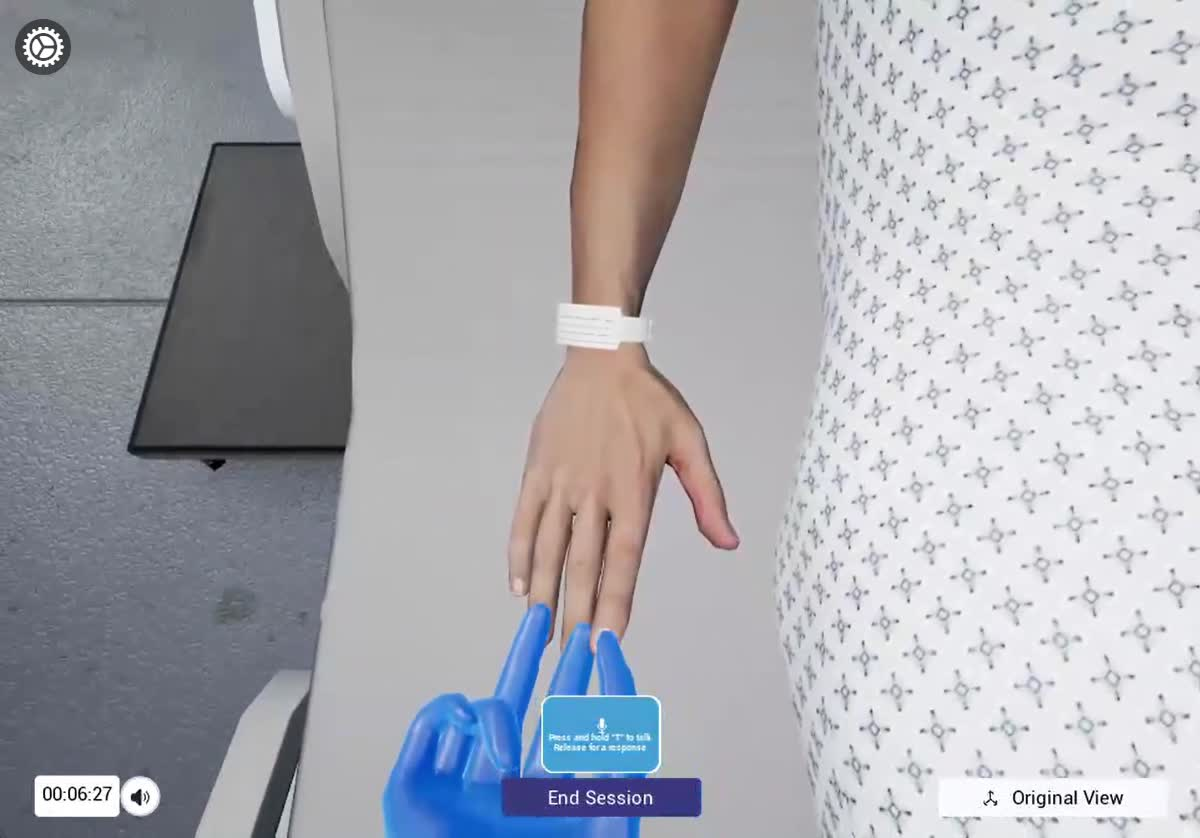
- Assessments: click Assess or Auscultate, for example on the wristband, heart, or lungs. If the patient is sitting up or in a chair, you can also listen to their back. Capillary refill is here too, and the refill plays out on screen.
- Actions: for example, click Sanitize to wash your hands.
- EMR: click View to open the EMR tablet, including the medication record and patient info.
ℹ️
Handwashing
There's no handwashing animation yet. Clicking Sanitize still ticks it off your checklist.
07Finish and check your results
At the end of a scenario
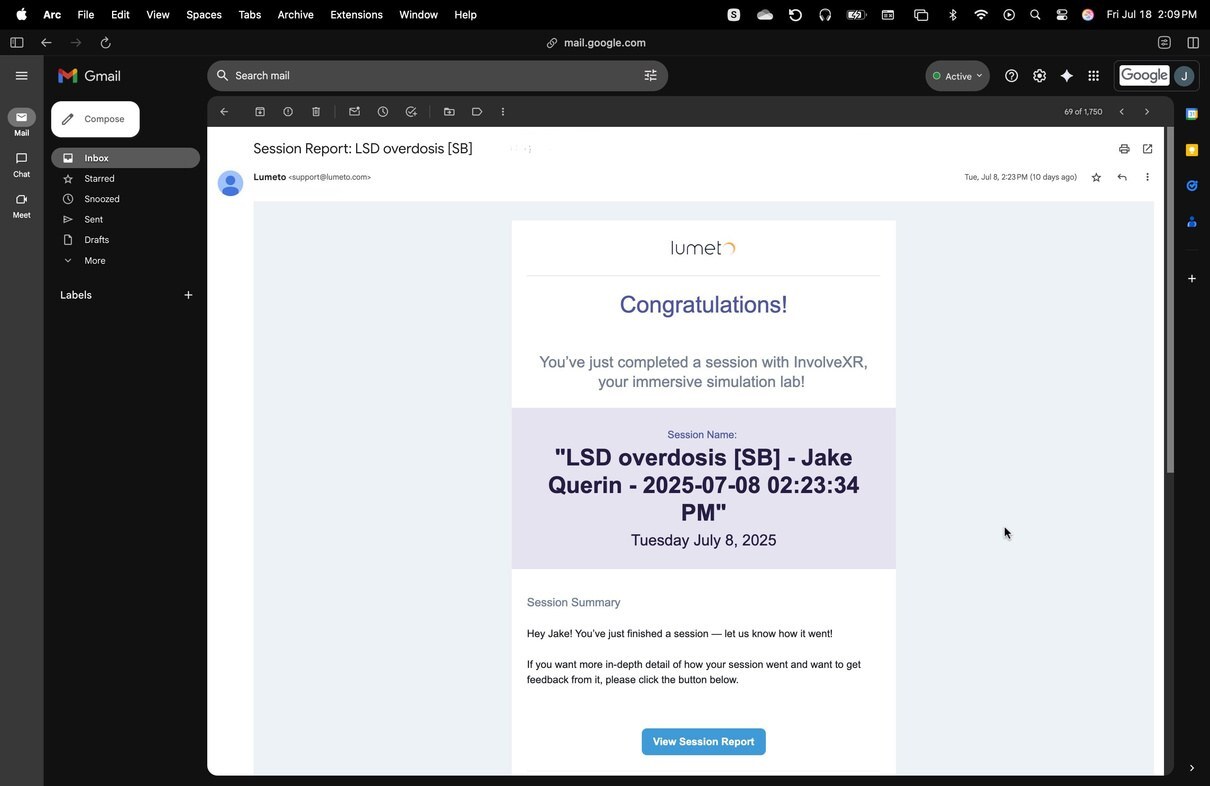
You'll see a closing message, plus performance insights and checklist feedback. A detailed summary of your performance is also emailed to you.
- Open the results email and click View Session Report.
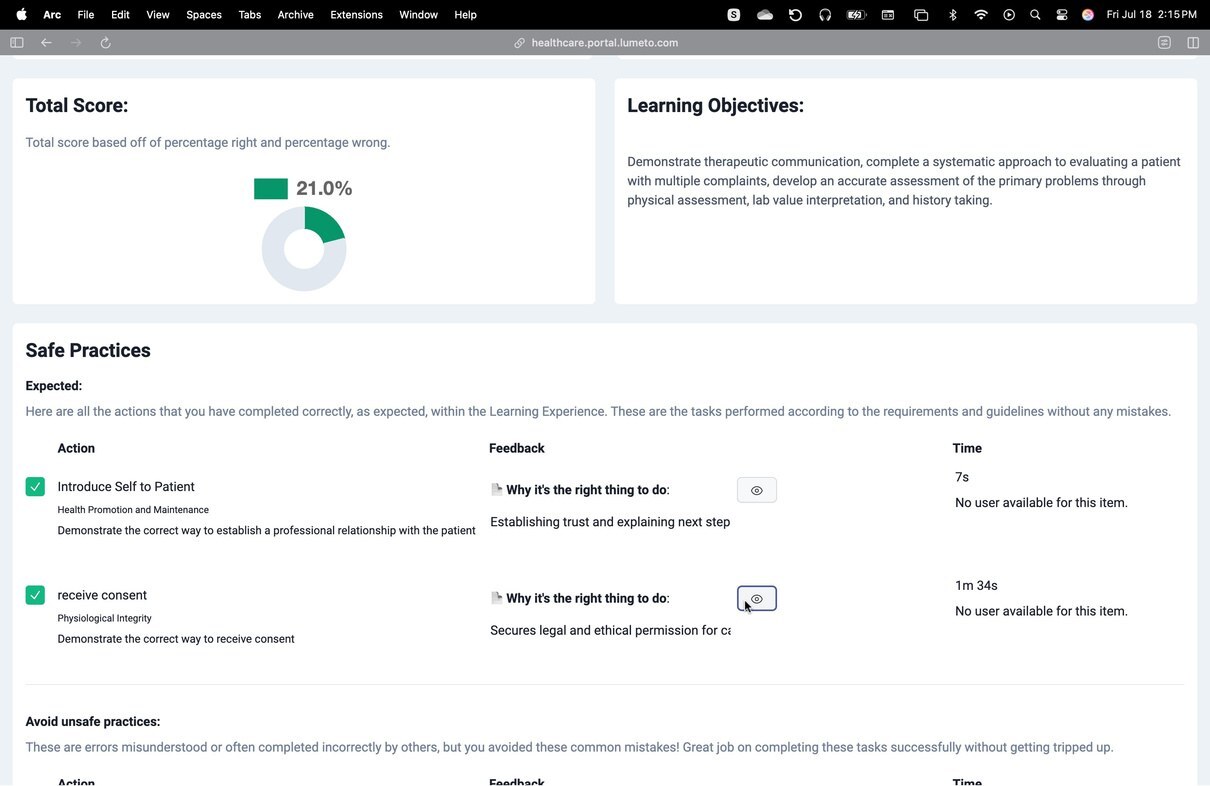
- The Web Portal opens in your browser. Sign in again if asked.
- Review your feedback, scores, and any instructor comments.

💡
Tip
Your full history is always at healthcare.lumeto.com.
08Having trouble?
The patient can't hear me
Most commonCheck your microphone is on and allowed in your computer's settings, and that you're holding T while you speak. If the circle on the speech widget isn't pulsing, you aren't being heard.
I can't hear the patient
Check your headphones are connected and selected as your computer's audio output.
I'm on a Mac
Windows onlyThe desktop app needs a Windows PC. Ask your administrator about other ways to join.
I can't find my results email
Check spam or junk, or sign in at healthcare.lumeto.com to see your history.
💻
You're ready for your first lesson.
You know the setup, the controls, and where to find your results.
-1.png?width=150&height=66&name=Lumeto%20Logo%20Reverse%20Transparent%20(1)-1.png)