Reference
Meta Quest hardware overview
Find your headset model, learn its buttons and ports, and check it is ready before a learner puts it on.
01Which headset do you have?
Look at the front of the headset. Tap a card to jump to its buttons and ports.
.png)
Meta Quest 3
Best image quality, with mixed reality passthrough.
Three pill-shaped sensors.png)
Meta Quest 3S
Same power as Quest 3 in a more compact body.
Three round sensors per side.png)
Meta Quest 2
Legacy device, fully supported.
Two small sensors at the edges⚠️
Most common mix-up
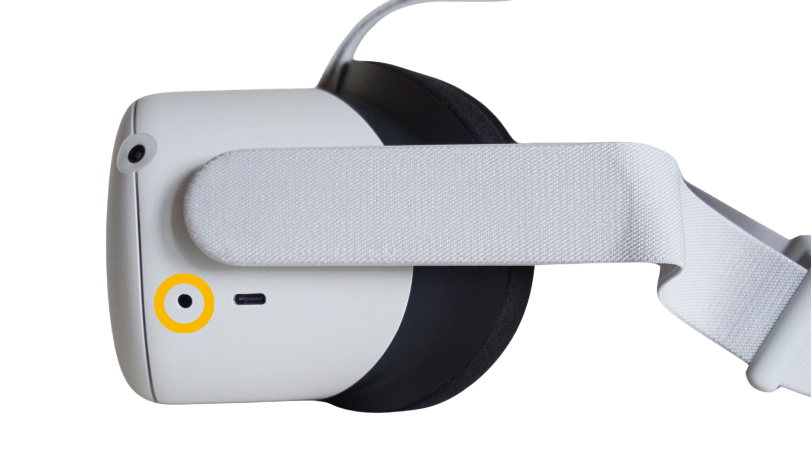
The Quest 3S power button is on the left side. On Quest 3 and Quest 2 it's on the right.
02Meta Quest 3
The flagship headset
The best image quality of the three, with full-colour mixed reality passthrough.
Headset buttons
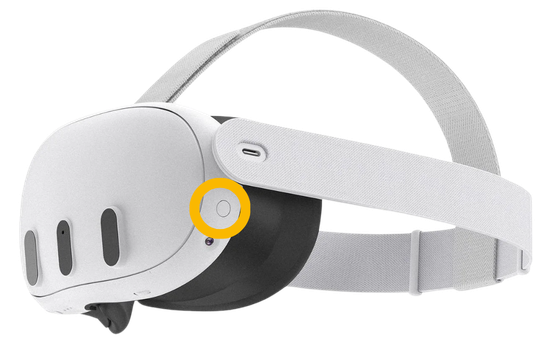
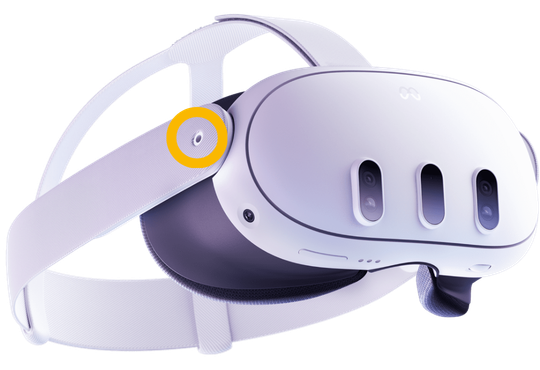
Power button
Right sideHold 3 seconds to power on or off. Short press to sleep or wake.
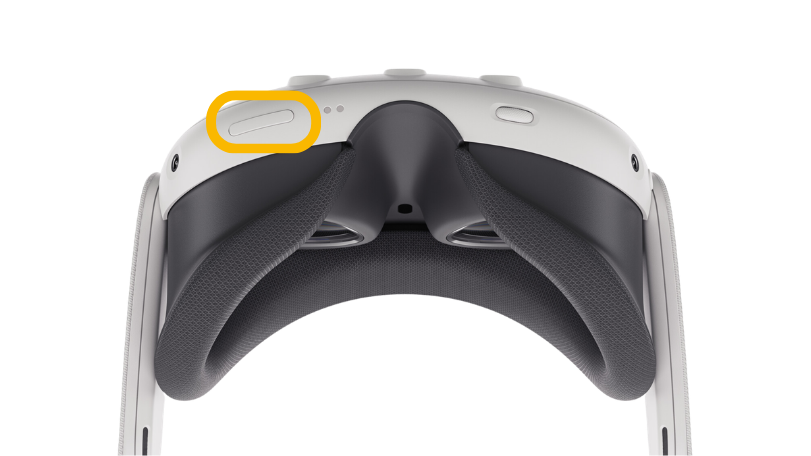
Volume buttons
Bottom leftAdjust volume up and down.
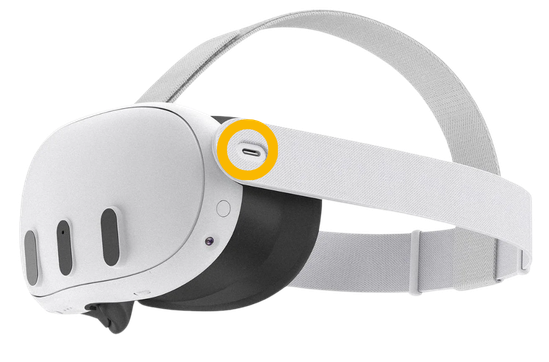
USB-C port
Near power buttonCharging.
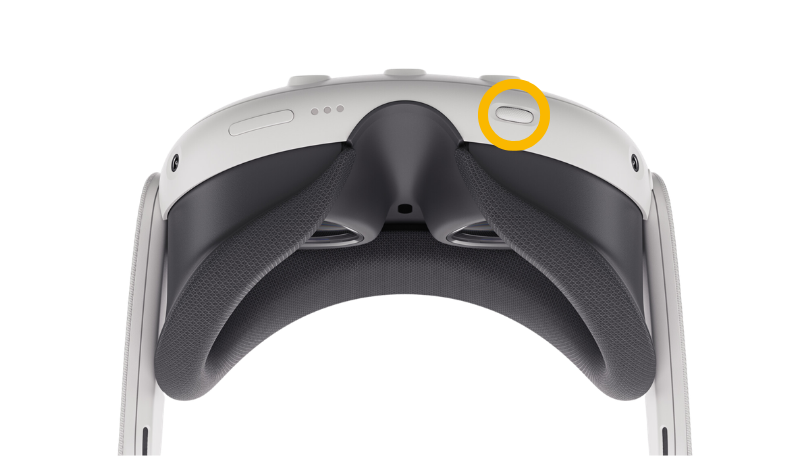
Clarity adjustment
Bottom rightTurn the dial on the bottom of the headset until the image looks sharp.
Audio jack
Left sidePlug in headphones here.
ℹ️
Info
The Quest 3 supports full mixed reality passthrough, so learners can see their real surroundings when the app calls for it. Useful for hybrid scenarios.
03Meta Quest 3S
Compact, same processor
Same processor and operating system as the Quest 3, in a more compact body with no IPD dial. The power button is on the left side, which is the most common source of confusion.
Headset buttons
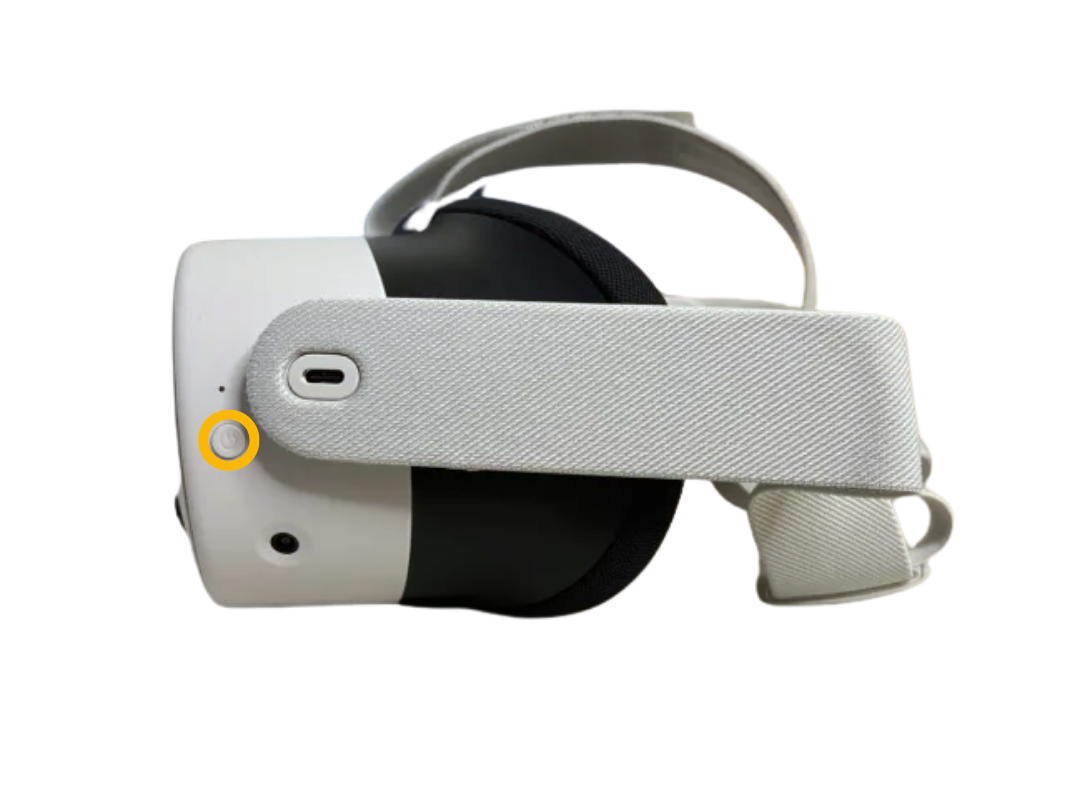
Power button
Left sideHold 3 seconds to power on or off. Short press to sleep or wake.
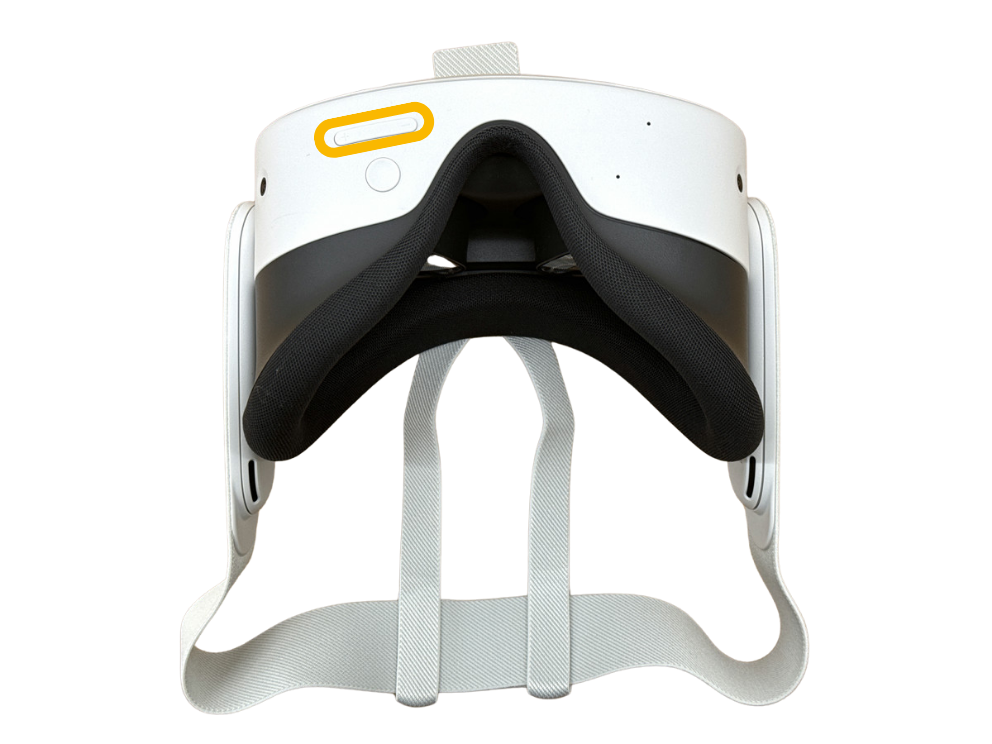
Volume buttons
Bottom rightAdjust volume up and down.
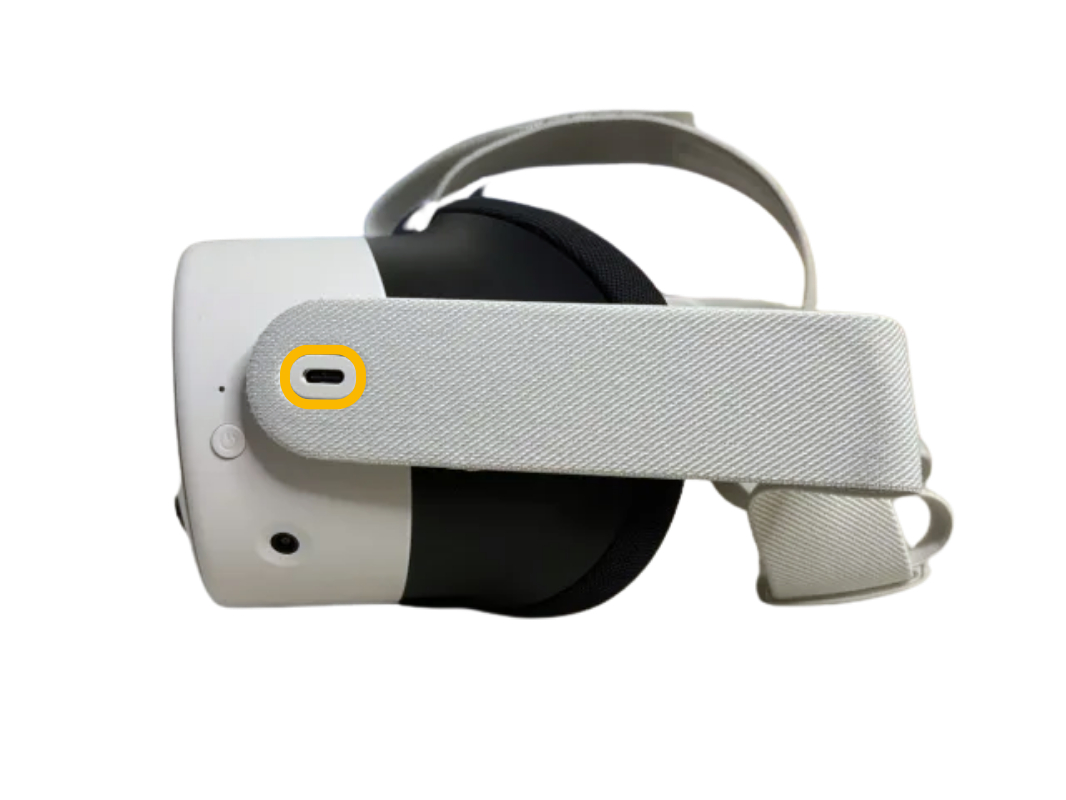
USB-C port
Left sideCharging.
Passthrough button
Bottom rightPress to turn passthrough on and off.
04Meta Quest 2 (legacy)
Older, still fully supported
Lower resolution and no colour passthrough compared to Quest 3 and 3S, but works well for clinical simulation.
Headset buttons
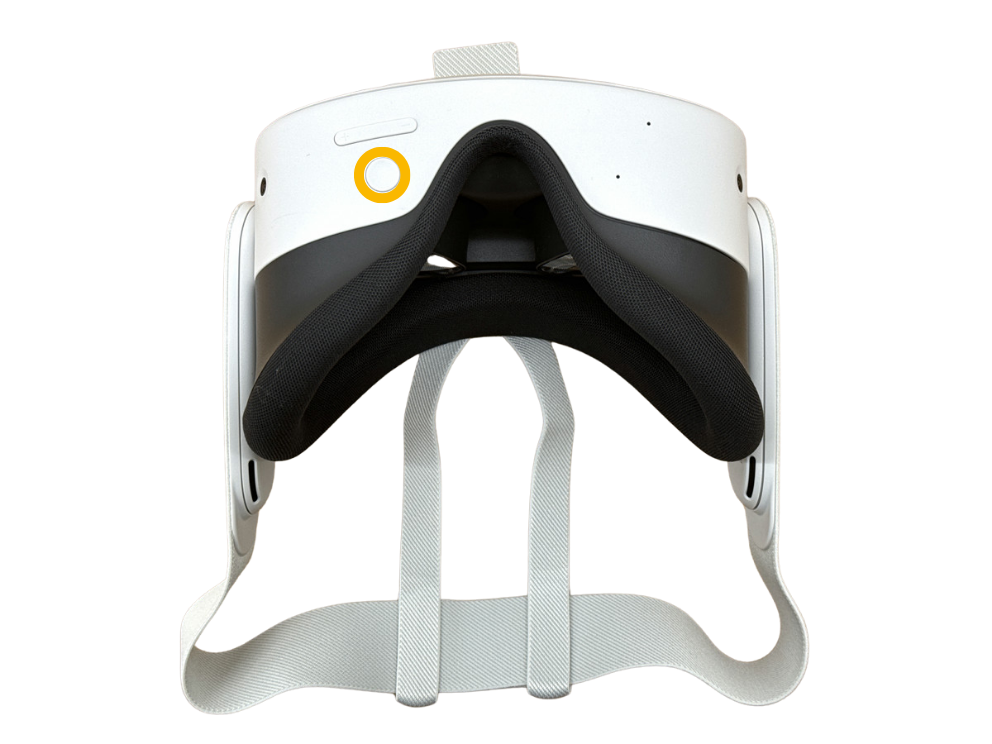
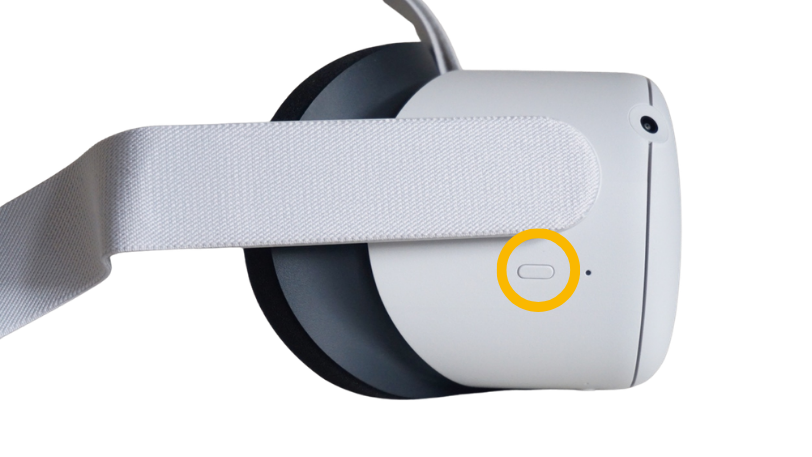
Power button
Right sideHold 3 seconds to power on or off. Short press to sleep or wake.
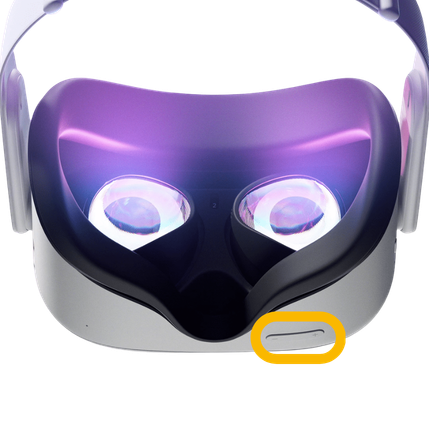
Volume buttons
Bottom rightAdjust volume up and down.
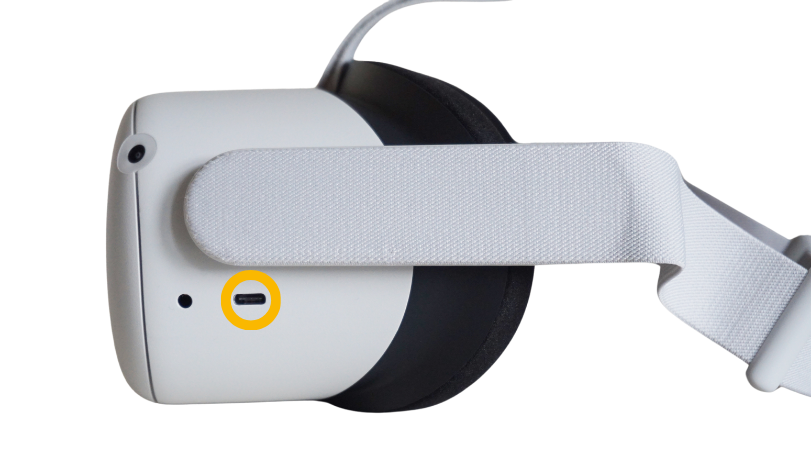
USB-C port
Left sideCharging.
3.5mm audio jack
Left sideHeadphone audio.
05Touch controllers
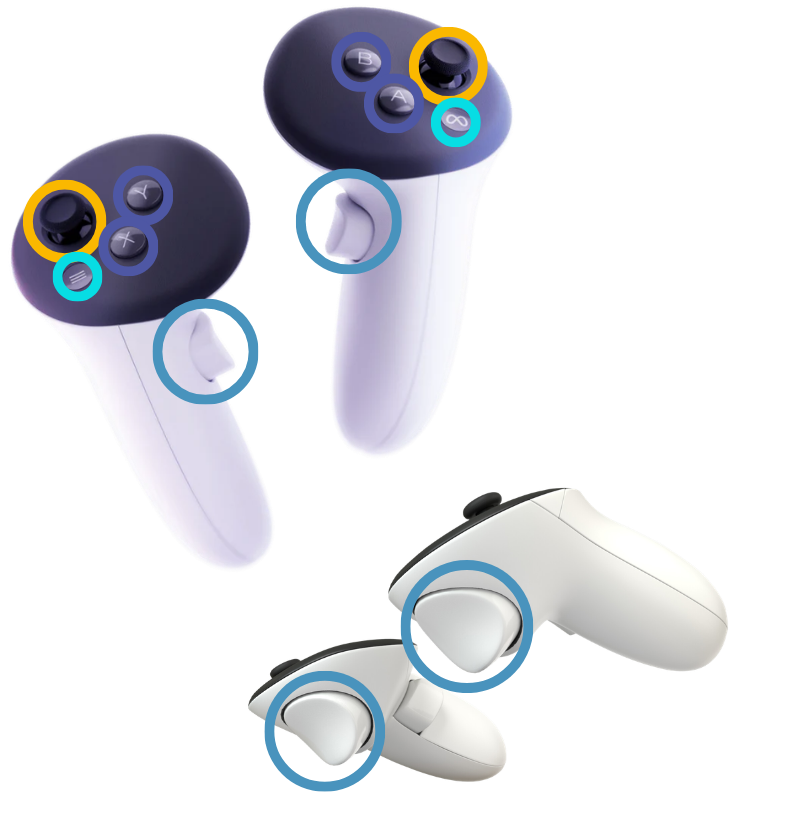
Every Quest headset ships with a left and right Touch controller. The button layout stays the same across generations, so learners can move between headsets without relearning the controls. Only the shape of the controllers changes.
Meta button
Trigger buttons
Joysticks
Face buttons (A, B, X, Y)
Quest 3 and Quest 3S controllers
Ringless design, with the tracking sensors built into the body of the controller. Quest 3 and Quest 3S ship with the same controllers.
Buttons and what they do
Joysticks
ThumbScroll through menus and move around the environment.
Trigger buttons
Index and middle fingerGrab objects and confirm actions in the simulation.
B button
Right controllerPress and hold to speak with virtual characters.
X button
Left controllerBring up tool tips.
Meta button
Right controllerIndented button. Returns to the Meta home screen in any app. Learners should not press this mid-session unless directed.
Menu button
Left controllerPauses the current scenario.
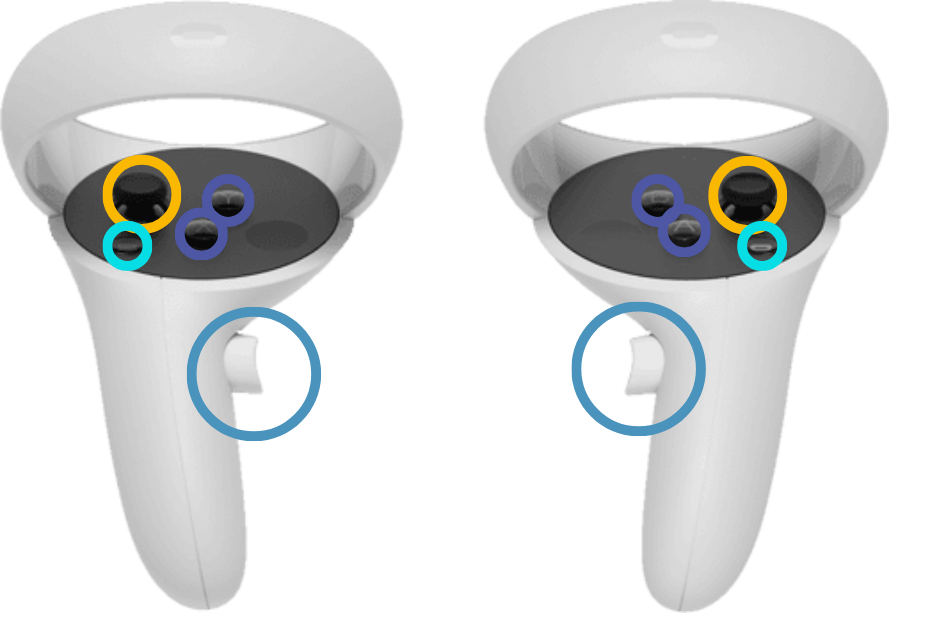
Quest 2 controllers
Older ring-shaped design with a flat Meta button. The button map is the same as Quest 3, so the controls transfer directly if a learner switches headsets.
What's different on Quest 2
Tracking rings
Top of controllerThe tracking sensors sit in the rings above the grip. Keep them clear of hands and lanyards.
Meta button
Flat, not indentedSame job as Quest 3, but sits flush with the controller.
Everything else
Joysticks, triggers, B, X, and the menu button all work the same way as on Quest 3.
💡
Tip
The B button for speaking and the Meta button for going home are the two your learners will use most. Point these out during onboarding.
How to hold the controllers
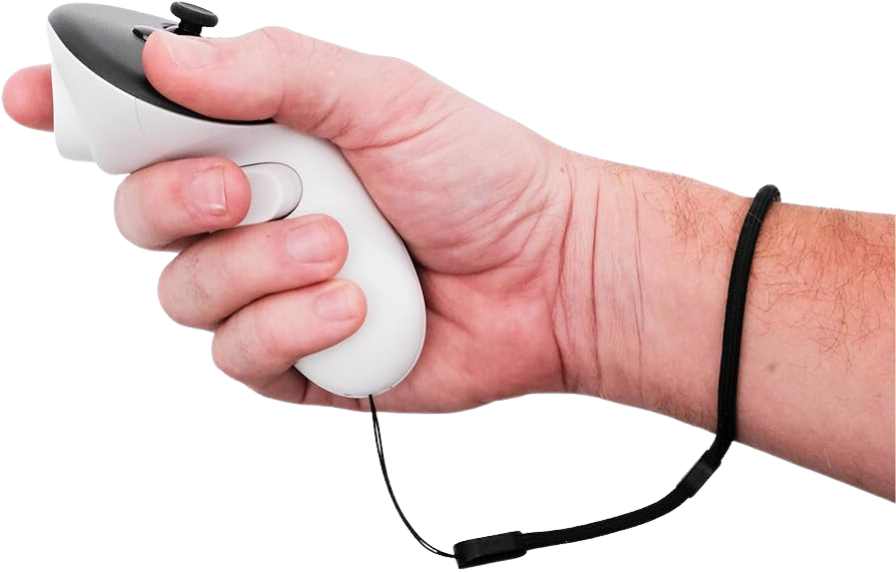
A relaxed grip keeps tracking accurate and stops the wrist strap from swinging into the sensors. Coach learners through this the first time they put on a headset.
How to hold
- Grip the controller comfortably with fingers on the triggers
- The middle triggers face inward, towards each other
- Rest thumbs on the joystick and face buttons
- Hold securely, but stay relaxed for smooth interaction
⚠️
Wrist strap
The wrist strap should be snug, not tight. If it swings loose it can knock into the tracking sensors and cause jitter during a scenario.
06Before handing a headset to a learner
Pre-session checklist
- Headset fully charged (solid green LED means full)
- InvolveXR installed (search "Healthcare" in the Quest App Library)
- Connected to your facility Wi-Fi
- Guardian boundary set up in your session space
- Lenses adjusted for the learner's IPD (Quest 3 and Quest 2 only)
- Controller batteries checked
⭐
Best practice
Charge headsets overnight before session days. A Quest at 20% will drain before a 30-minute scenario ends.
🥽
You know your hardware.
Next up: putting the headsets in a room, and getting learners in.
-1.png?width=150&height=66&name=Lumeto%20Logo%20Reverse%20Transparent%20(1)-1.png)